REVIEW · ADELAIDE
Adelaide City Highlights Tour
Book on Viator →Operated by SeaLink South Australia · Bookable on Viator
First morning in Adelaide? Start here. This 3-hour air-conditioned coach tour gives you a fast read on the city’s layout, from North Terrace to the parklands, with a live guide talking you through what you’re seeing. I especially like how it helps you connect the dots between major sights without figuring out buses or trams.
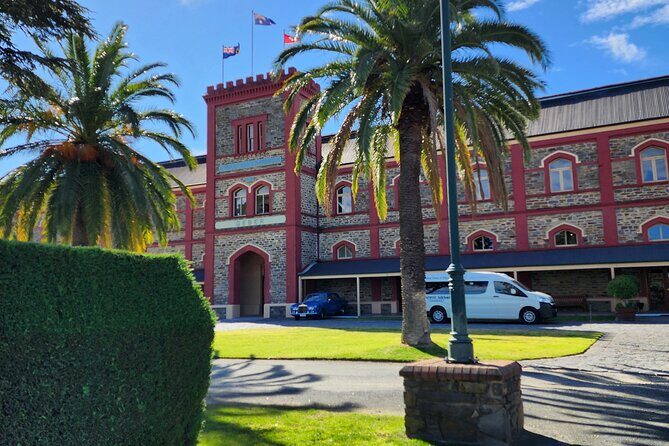
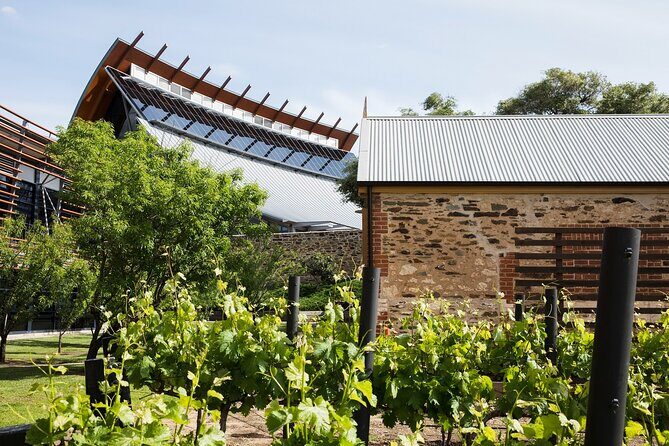
My other favorite part is the National Wine Centre stop at the edge of the Botanic Gardens, with entry to the Wine Discovery Journey Museum and time to wander on your own. One drawback to keep in mind: the St Peter’s Cathedral visit is listed as subject to availability, so you may not always get the full cathedral moment.
In This Review
- Key highlights that actually matter
- Why this 3-hour Adelaide loop helps you plan the rest of your trip
- Meeting in central Adelaide and what the morning schedule feels like
- North Terrace and Adelaide’s cultural precinct: what you’ll notice first
- National Wine Centre at Botanic Gardens: included museum time and how to use it
- Botanic Gardens and Botanic Park: why this stop matters even if you don’t go in
- Adelaide Oval quick look vs. St Peter’s Cathedral availability
- Elder Park drop-off: the smartest “after the tour” move
- Live guide commentary and the “small-group” feel (without the fuss)
- Price and value: what $63.12 really buys you
- Who this tour suits best (and who may want a different plan)
- Should you book the Adelaide City Highlights Tour?
- FAQ
- FAQ
- How long is the Adelaide City Highlights Tour?
- What time and where does the tour start?
- What’s included in the tour price?
- Do I need to pay for food or drinks during the tour?
- Is the bus air-conditioned?
- Can I cancel for free?
Key highlights that actually matter
- Air-conditioned comfort on a morning loop that’s built for Adelaide heat
- Wine Discovery Journey Museum included at the National Wine Centre, with about 30 minutes to explore
- Botanic Park + Adelaide Zoo precinct passed as part of the parklands-and-gardens story
- Quick photo-and-stroll stops at Adelaide Oval and St Peter’s Cathedral (availability can affect the cathedral)
- Small-ish group size (max 48) so the guide can keep the commentary moving and still be heard
Why this 3-hour Adelaide loop helps you plan the rest of your trip
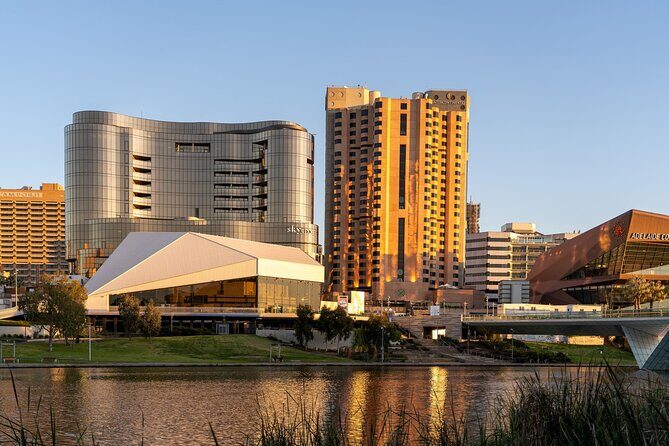
If you only have a couple of days in Adelaide, orientation is everything. This tour is designed for that first day feeling: you ride past the big landmarks, learn how the districts connect, and come away knowing what you want to revisit later.
The bus route matters. You’re guided through the city’s cultural core along North Terrace, then into the garden-and-park area that makes Adelaide different from many Australian cities. Instead of treating the sights as random stops, the guide ties them together so you understand why they’re clustered the way they are.
I also like that the pacing is built for real time constraints. Each major stop is short enough to keep energy up, but long enough to walk around, take photos, and spot useful nearby streets for later self-exploration. And because it’s an air-conditioned coach, you can enjoy the sightseeing without cooking yourself in Adelaide’s summer sun.
Other Adelaide CBD city tours reviewed in Adelaide



Meeting in central Adelaide and what the morning schedule feels like
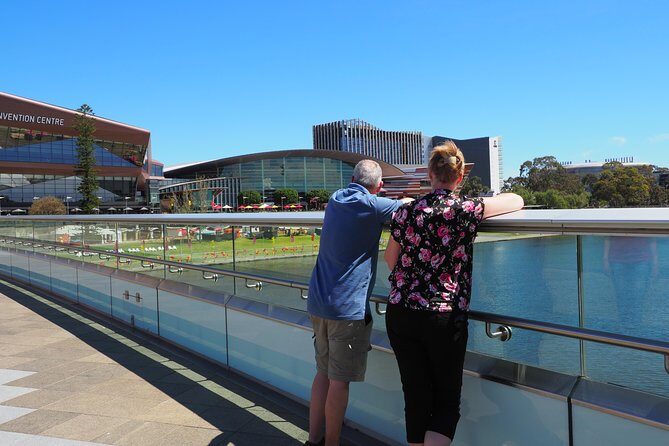
You start from Adelaide Central Bus, Franklin St 83 at 9:15am, and the tour ends back at the same meeting point. That matters more than you might think. A central start-and-finish means you don’t have to solve the “where do I end up” problem, especially if you’re also doing other booked activities later in the day.
The tour runs about 3 hours total, with a steady rhythm: ride, brief explanation, short stop, and back on the bus. With a maximum of 48 travelers, the group is big enough to feel lively, but small enough that your guide can still manage the timing at each stop.
If you’re thinking about pickup, selected Adelaide CBD hotels can offer pickup and drop-off on request. Even if you don’t qualify, the meeting point is listed as near public transportation, so you can usually arrive without stress.
North Terrace and Adelaide’s cultural precinct: what you’ll notice first
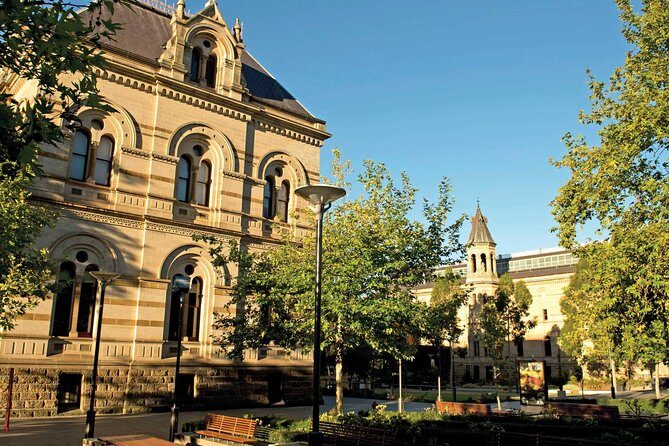
One of the best parts of the tour is what you see while you’re simply driving. The route passes the museum and art gallery area and historic university buildings along the cultural precinct. Even if you don’t go inside anything during the tour, the street-level context is useful.
Here’s what to look for while you’re on the bus: notice how the city’s major institutions sit along a straight, walkable spine. That makes it easier later to plan a self-guided morning on foot. If you like “understanding the city,” this is the kind of viewing that pays off.
You’ll also get guided context about Adelaide’s districts, including the shift toward historic North Adelaide. That matters if you want to do more than just snap one landmark photo and leave.
A small practical point: because you’re on a coach, you can absorb details you might miss if you were rushing from stop to stop by yourself. The guide’s running commentary keeps the sights from turning into a blur.
National Wine Centre at Botanic Gardens: included museum time and how to use it

The National Wine Centre of Australia stop is the heart of the tour for many people. You’ll visit the centre at the edge of the Adelaide Botanic Gardens area, and you get free time to explore the Wine Discovery Journey Museum. The museum admission ticket is included, so you’re not paying extra just to access the main indoor experience.
This stop is about choice. You can move through at a comfortable pace, focus on the parts that interest you (history, exhibits, or how South Australia’s wine story is presented), or just treat it like a cool indoor reset from the morning heat. It’s also a good break if you’re traveling with kids or anyone who needs a slower moment.
What I like about this setup is that the tour doesn’t ask you to stay glued to the group. The museum time gives you a chance to do your own thing while still staying within the tour’s total schedule.
One caution: the tour includes the museum visit, but food and drinks aren’t included unless specified. So if you want lunch, budget for it separately. Some people come expecting more tasting-style extras; what you’re guaranteed is the museum entry and the time to walk through it.
Botanic Gardens and Botanic Park: why this stop matters even if you don’t go in

Adelaide’s identity is strongly tied to its parks. This is one reason the tour is such a smart first outing: it gets you into the part of the city that locals are proud of.
During the ride, you pass the Adelaide Botanic Gardens and Botanic Park, including the areas associated with the Bicentennial Conservatory and the Adelaide Zoo. Even though you’re not doing a full zoo or conservatory visit on this tour, you’re seeing how the green spaces shape the city’s feel and movement.
Here’s what to do with this information: as soon as the tour ends, you’ll know where the park connections are. That makes it much easier to plan a separate walk later—either for a relaxed afternoon or to line up a bigger attraction you’ll want to do properly with time.
If you’re a photo person, you’ll also get useful angles. The gardens-and-park sections give you shade, architecture glimpses, and “Adelaide looks like this” moments that are harder to find if you only concentrate on central streets.
Other city tours we've reviewed in Adelaide



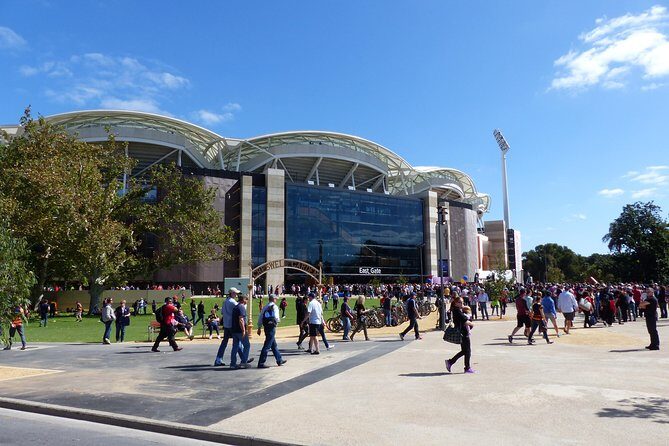
Adelaide Oval quick look vs. St Peter’s Cathedral availability
Two iconic stops come next: Adelaide Oval and St Peter’s Cathedral (subject to availability).
At Adelaide Oval, you get time for a quick wander—listed as about 30 minutes—and admission is free. This is ideal if you want to see the stadium area, grab photos, and get a feel for the location. If you’re hungry for more, the tour info points you toward options like Stadium Tours or RoofClimb-style experiences after the highlights tour ends.
St Peter’s Cathedral is another major Adelaide marker. You’ll have a short 30-minute wander there, with free admission listed. But the big practical detail is that the cathedral stop depends on availability. That can happen for lots of reasons—service schedules, access changes, or event timing. I’d go in with a mindset of flexibility: enjoy the cathedral if it’s open, and if it isn’t, use the rest of your day to still explore the North Terrace and parklands area that the tour sets up for you.
If you’re only in Adelaide briefly and cathedral access is a must, you might want to plan a backup idea for the same morning. This tour gives you a strong baseline either way.
Elder Park drop-off: the smartest “after the tour” move

The tour includes an Elder Park segment, with a shorter stop and the option to be dropped off there. This is useful because it can turn the end of the tour into a head start.
Depending on what you want next, Elder Park can work as a pivot point. If you’re aiming to combine Adelaide Oval follow-up with more walking, this is convenient. If your plan is to move toward the zoo area, it can help you get going without backtracking to the main pickup area.
Even if you stay with the main return route, the Elder Park portion gives you a sense of the coastline-to-greens direction and how Adelaide’s major attractions are threaded through the city.
Live guide commentary and the “small-group” feel (without the fuss)
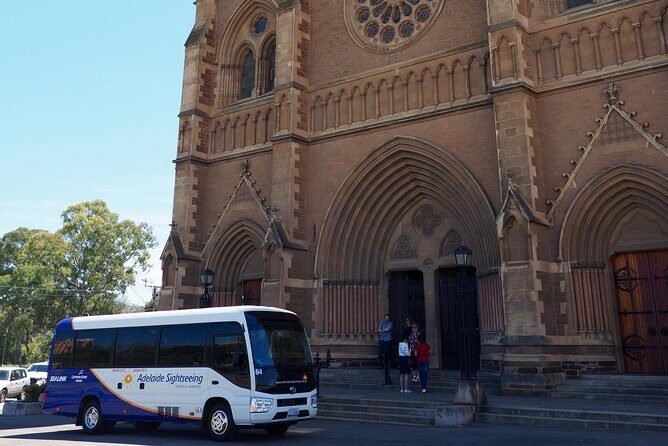
A highlights tour lives or dies on the guide. This one includes live commentary on board, and the tour is run by a local guide through a coach format that keeps things simple.
In the feedback I’ve seen, guides named Athol, Steve, Peter, Roger, and Toby come up often for clear explanations and steady pacing. The common thread: narration that helps you understand what you’re looking at, not just where it is.
The coach format helps, too. The bus is described as modern and roomy, which makes short stops and quick boarding feel easier. With a group capped at 48, you’re less likely to feel swallowed by a huge crowd.
Also, you’re traveling with a mobile ticket, so you don’t have to deal with printing. That kind of small tech convenience makes a morning tour feel less like admin.
Price and value: what $63.12 really buys you
At $63.12 per person for about 3 hours, the value question is simple: are you getting enough “paid time” that would cost you money or planning on your own?
Here’s what you’re getting for your ticket:
- transport by air-conditioned coach
- live commentary with a local guide
- included entry to the Wine Discovery Journey Museum (at the National Wine Centre)
- short stops with free admission listed for Adelaide Oval and St Peter’s Cathedral
- a structured route that covers the major districts, not just one neighborhood
If you’re a first-timer, this can be a smart buy because it compresses planning. Instead of spending a morning figuring out the best bus or juggling a few separate attractions with different ticket times, you get a single route that shows you what matters and where.
If you’re already an Adelaide pro with a rental car and a long list of attractions, you might feel the price less justified. This tour isn’t built to replace a full day at the zoo, a full museum afternoon, or stadium experiences. It’s built to give you bearings, then let you choose what deserves your real time.
Who this tour suits best (and who may want a different plan)
This tour fits best if:
- You’re new to Adelaide and want an easy intro
- You like seeing several key sights without a lot of transport work
- You’ll enjoy a short museum stop rather than a long wine day
- You prefer coach comfort in warm weather
It may not be the best choice if:
- You want long time inside major attractions
- You’re the type who hates time limits and strict start/stop schedules
- You’re mainly chasing one big ticket activity like a full stadium tour or a long zoo day (you’ll need more time elsewhere)
For most people, the sweet spot is a first morning. Do this early, then build the rest of your trip around what you liked most.
Should you book the Adelaide City Highlights Tour?
Yes, if you want a practical first taste of Adelaide. I’d book it as your kickoff activity—especially because the tour mixes guided city context with a real indoor stop at the National Wine Centre, and it does it with air-conditioned comfort.
I’d think twice if cathedral access is your top priority, since St Peter’s Cathedral is listed as subject to availability. Even then, the tour still covers enough districts that you’re unlikely to feel totally stuck; you’ll still come away with a better sense of where things are.
One last nudge: plan to spend money separately on meals since food and drinks aren’t included, and treat the wine stop as a museum and walkaround time, not a full wine-tasting feast.
FAQ
FAQ
How long is the Adelaide City Highlights Tour?
It runs for about 3 hours.
What time and where does the tour start?
The tour starts at 9:15am from Adelaide Central Bus, Franklin St 83, Adelaide SA 5000, and it ends back at the same meeting point.
What’s included in the tour price?
The ticket includes live commentary on board and a local guide. Admission to the Wine Discovery Journey Museum at the National Wine Centre is included, and admission is free for the stops at Adelaide Oval and St Peter’s Cathedral.
Do I need to pay for food or drinks during the tour?
No. Food and drinks are not included unless specified.
Is the bus air-conditioned?
Yes. You travel in an air-conditioned coach.
Can I cancel for free?
Yes, you can cancel for a full refund up to 24 hours in advance of the experience start time.