REVIEW · ADELAIDE
Ultimate Adelaide City and Hahndorf Tour
Book on Viator →Operated by SeaLink South Australia · Bookable on Viator
Adelaide is a great city to orient yourself in, and this tour does that fast. You’ll get guided highlights around North Adelaide and cultural sights, then head into the hills for panoramic views from Mt Lofty and a free afternoon in Hahndorf. It’s a simple, efficient day built for first-timers.
I love that the morning is a real overview—think St Peter’s Cathedral (or Adelaide Oval), the Botanic Gardens area, and key spots along Cultural Boulevard. I also like the afternoon structure: you get included Hahndorf Inn tastings, plus plenty of independent time to explore the main street.
One drawback to plan around: lunch is on your own, and the day has a timed midday break that can feel a little like two mini-tours stitched together.
In This Review
- Key things to know before you go
- A one-day Adelaide orientation plus Adelaide Hills views
- Morning pickup and the North Terrace cultural corridor
- National Wine Centre stop: quick entry, no long commitment
- St Peter’s Cathedral (or Adelaide Oval): short stop, big payoff
- The noon King William Street break: use it well
- Adelaide Hills drive via Crafers, Stirling, Aldgate, Bridgewater
- Mt Lofty Summit: the quick view that sells the whole region
- Beerenberg Farm Shop: taste-first, purchases optional
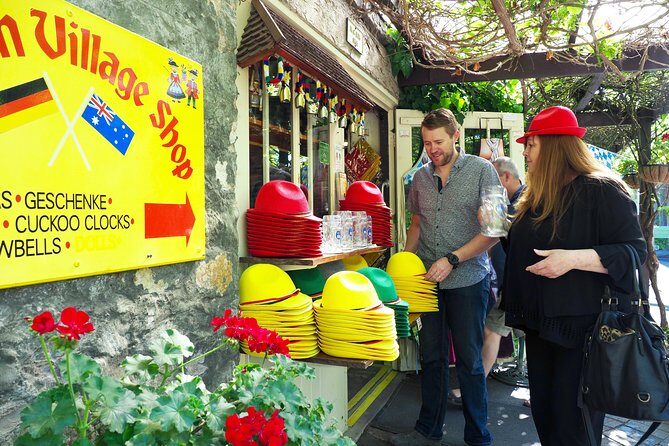
- Hahndorf afternoon: German village wandering with included tastings
- Comfort, group size, and what to bring for a smooth day
- Price and value: what you actually get for $119.78
- Should you book the Ultimate Adelaide City and Hahndorf Tour?
- FAQ
- How long is the Ultimate Adelaide City and Hahndorf Tour?
- What time does the tour start?
- Where does the tour start and end?
- Is lunch included?
- What happens around noon on King William Street?
- How long is the stop at Mount Lofty Summit?
- Is admission included at the National Wine Centre of Australia?
- How long do you have in Hahndorf?
- How many people are on the tour?
- What is the cancellation policy?
Key things to know before you go
- Two-part day flow: morning city viewing, then an Adelaide Hills drive and a longer Hahndorf wander
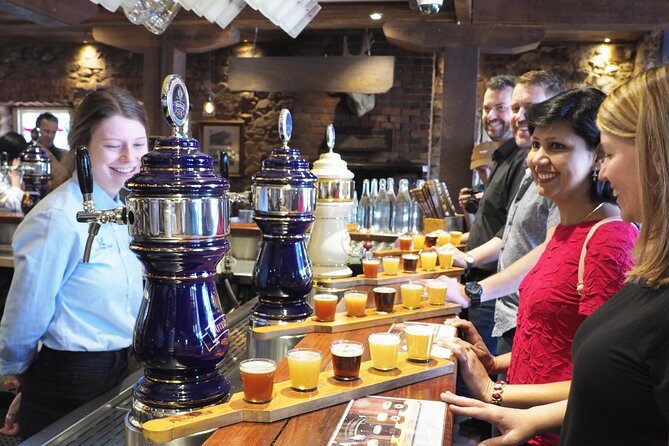
- Included tasting in Hahndorf: choose afternoon tea or a traditional German beer tasting at the Hahndorf Inn
- Mt Lofty photo stop: quick summit time with city-to-coast views
- Short, focused stops: National Wine Centre, St Peter’s Cathedral/Adelaide Oval, Beerenberg Farm Shop
- Group size cap: up to 48 travelers, with air-conditioned coach travel
A one-day Adelaide orientation plus Adelaide Hills views
This is the kind of tour that helps you get your bearings fast. If you’re landing in Adelaide and want the highlights without turning your day into a logistics puzzle, you’ll like this format. The morning gives you a clear mental map of the city—where the action and landmarks sit—then the afternoon flips you into hillside scenery and a German heritage town.
The value here comes from pairing two very different experiences into one ticket: city landmarks plus Hahndorf freedom. That’s why it works well for first-time visitors, or for anyone who only has one full day. You’ll also benefit from guided commentary while you’re moving through neighborhoods and lookouts. In past departures, guides such as Roger, Peter, Mike, Phil, and Marty have been noted for being friendly and informative, which matters on a long day when you want the driving time to feel purposeful.
The pace is also forgiving in the right places. The stops are short enough to stay efficient, but Hahndorf itself gives you real time to browse, snack, and take photos at your own speed.
Other Adelaide Hills and Hahndorf tours reviewed in Adelaide


Morning pickup and the North Terrace cultural corridor
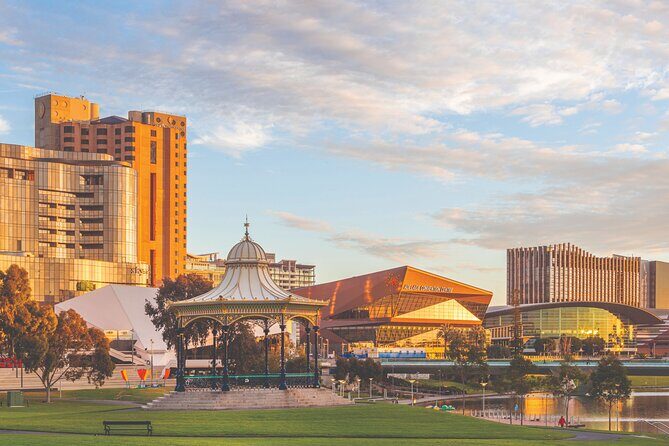
Your day starts with morning pickup in central Adelaide and an air-conditioned coach ride. From there, you’ll travel through Adelaide’s Cultural Boulevard area and get a guided look at major public buildings and institutions. The route passes the SA Museum, the Art Gallery, the State Library, Parliament House, Government House, and the universities—big-sight architecture that helps you understand how Adelaide’s city center is planned.
If you enjoy seeing cities through their “spine” roads and civic precincts, this is a strong way to start. It’s also a good setup for photo time because you’ll be on main viewing streets rather than random side lanes.
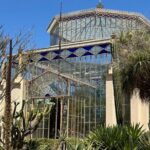
After that, the tour moves into the Botanic Gardens zone. You’ll see the Adelaide Botanic Gardens area and the Bicentennial Conservatory, plus you’ll spot where the National Wine Centre sits nearby. This area is scenic even when you don’t stop for long—you get the sense of Adelaide as a city that plans green spaces right next to culture.
Practical tip: dress for walking, even on a day that’s mostly riding. Some stops are quick, but you’ll want comfortable shoes for stairs and uneven pavement around cathedral areas and busy main streets later in the day.
National Wine Centre stop: quick entry, no long commitment

One of the included moments in the morning is a stop at the National Wine Centre of Australia. You’ll have time to explore the Wine Discovery Journey Museum (admission included). This is a smart choice for a few reasons:
- It’s short enough to fit the schedule without stealing your whole morning.
- It gives you a themed Adelaide context. South Australia’s wine culture is everywhere here, and the museum helps you connect the dots without turning the tour into a full winery day.
- You can move at your own speed inside the museum while your guide handles the outside commentary.
You’ll also get the visual payoff: the Wine Centre is set right on the edge of the Botanic Gardens, so you’re not stuck in a “gray box” attraction. Even if you don’t buy anything, the stop helps the rest of your day feel tied together.
St Peter’s Cathedral (or Adelaide Oval): short stop, big payoff
The tour then includes a free time stop at St Peter’s Cathedral or Adelaide Oval. You’ll get about 30 minutes, which is enough for a quick look, photos, and a moment to appreciate Adelaide’s religious and sporting icons side by side.
If you’re the type who likes “landmark religion” (and the architecture that comes with it), St Peter’s Cathedral is the more classic pick. If you’d rather focus on a major sports venue, Adelaide Oval gives you a sense of the city’s identity beyond museums and monuments.
Either way, this stop works as a breather. You’re not locked into a guided walk here—you can step in, look around, and decide what to photograph. Just don’t plan a full cafe stop during this window. It’s meant to be a look-and-go.
The noon King William Street break: use it well

Here’s where this tour really feels like it has two parts. Around 12:00 pm it stops on King William Street near Rundle Mall. You have a choice:
- You can get off and handle lunch on your own, then make your way back to the Adelaide Central Bus Station by 1:00 pm.
- Or you can stay on the coach, with a return toward the center around 12:15 pm, then have free time until boarding again at 1:15 pm.
Either approach is fine, but it’s worth planning your lunch strategy before you step off. Lunch isn’t included, so you’ll be paying for it yourself.
My practical advice: aim for something quick that doesn’t require a long wait. If you want an easy Adelaide food stop near the central area, Central Markets is a common option people use because it’s walkable from the main sights and offers plenty of choice when you’re on a time clock.
Also, bring a small layer. Even in Adelaide, the timing between the morning and the hills drive can mean you’ll feel temperature shifts on the coach.
Other Adelaide CBD city tours reviewed in Adelaide

Adelaide Hills drive via Crafers, Stirling, Aldgate, Bridgewater
After lunch time, you head into the hills. The afternoon begins around 1:15 pm, and the scenery changes fast. You’ll travel through the Adelaide Hills via Crafers, Stirling, Aldgate, and Bridgewater, with commentary along the way so you understand what you’re seeing from the road rather than just watching pass by.
These drives are where you start to feel why this region is so popular. You get photo moments, changing viewpoints, and that “short escape” feeling without having to plan your own rental car route.
The big viewpoint stop is next.
Mt Lofty Summit: the quick view that sells the whole region

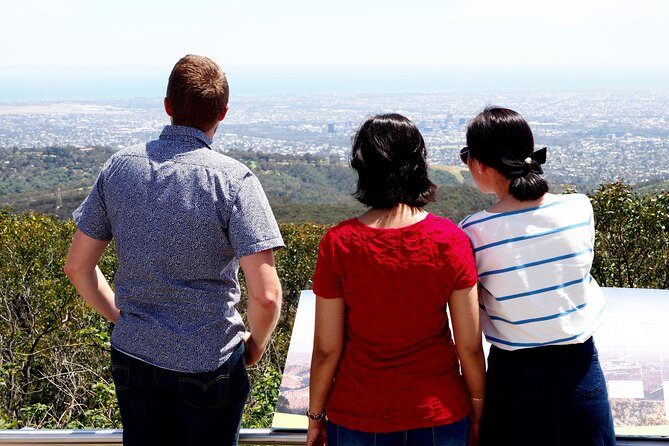
You’ll travel to Mt Lofty Summit for about 15 minutes. This is one of those “short but worth it” stops. The point isn’t a long hike—it’s the sweep of views across Adelaide toward the sea.
Because your time is limited, come ready to move. If it’s overcast or windy (it happens), hold your camera settings simple and plan for quick framing. In a 15-minute stop, you’ll want one good photo and then a slow scan of what’s around you.
The advantage of including Mt Lofty is that it gives you a high point early in the hills segment, so the rest of the afternoon villages feel grounded in scale. You see the hills, then you go down into the towns where people actually live and shop.
Beerenberg Farm Shop: taste-first, purchases optional
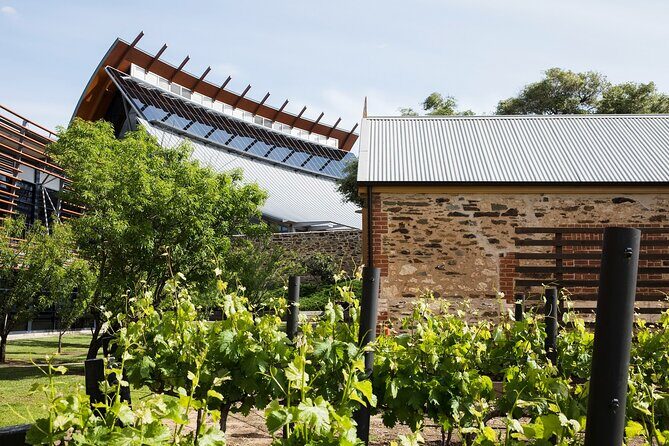
You’ll have a short stop at Beerenberg Farm Shop for about 10 minutes. It’s included as a stop, and it’s also where you can taste products and consider purchases. The key detail: sampling is part of the experience, but buying is optional and on your own.
This stop is practical because it’s easy for most budgets and appetites. If you like taking home edible souvenirs, you’ll find plenty to choose from. If you don’t want to shop, you still get that local “this is a thing people do here” moment.
Just don’t count on this being a full food break. It’s a quick stop to taste and decide.
Hahndorf afternoon: German village wandering with included tastings
Now for the reason many people book this tour: Hahndorf.
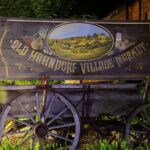
Once you arrive, you get 1 hour 50 minutes to explore independently. That’s long enough to browse the main street, pop into shops, and slow down without feeling rushed. Hahndorf is Adelaide’s best-known German settlement, and it shows in the shops, produce stands, and the general look of the town’s historic core.
The included feature here is at the Hahndorf Inn Hotel. You’ll have your choice of:
- afternoon tea, or
- a traditional German beer tasting.
If you’re traveling with mixed preferences, this choice is a big plus. Tea works for lighter tastes and families. Beer tasting suits people who want a more distinct regional flavor experience. Either option pairs nicely with the town’s food-and-shopping atmosphere.
What I like about the way this is set up is that you don’t have to “perform” during the tour. You’ll get the included moment, then you’re free to decide how you want to spend the rest of your time—crafts, souvenirs, local specialties, or just strolling and people-watching.
Photo tip: Hahndorf’s main street is the focal zone, so if you want the best concentration of storefronts and heritage vibes, spend more time there and less time chasing side streets.
Comfort, group size, and what to bring for a smooth day
This is a coach day, not a private car day. That’s part of why it’s good value, but it also affects comfort. The group is capped at 48 travelers, and the ride is air-conditioned, which helps in summer and shoulder seasons.
Still, a few things are worth planning for:
- Coach seating can feel tight on long days. One traveler noted the vehicle can feel cramped on some departures, so pick a seat where you can get in and out comfortably.
- You’ll do short walking bursts. Bring shoes that work for uneven sidewalks and quick stops.
- Weather changes with elevation. Hahndorf and Mt Lofty can feel different from Adelaide city center, so a light jacket or layer is smart.
And since lunch isn’t included, budget a meal during the noon break. If you’re the kind of person who likes snacks, pack a small backup so you aren’t hunting food under pressure.
Price and value: what you actually get for $119.78
At $119.78 per person, you’re paying for a full-day structure, not just a list of destinations. The value is in the combination of:
- Guided city orientation with major landmarks (Cultural Boulevard, Botanic Gardens area, cathedral/oval)
- An included museum stop at the Wine Discovery Journey Museum
- Scenic hills driving with a Mt Lofty summit viewpoint
- A short stop at Beerenberg Farm Shop for taste/souvenirs
- Nearly two hours in Hahndorf, plus a meaningful included food or drink moment (afternoon tea or German beer tasting)
You’re also saving time. If you tried to DIY this day by bus and taxi, the timing would get messy fast, especially for Mount Lofty and keeping a smooth connection to Hahndorf.
The main “cost” you should factor in is the obvious one: lunch is extra and your purchases at Beerenberg and Hahndorf are optional but common. If you treat this as a one-day highlights plan (and not as a cheap way to eat all day), it feels like fair money.
Should you book the Ultimate Adelaide City and Hahndorf Tour?
Book it if you want:
- a clear first-timer Adelaide overview,
- a scenic Adelaide Hills afternoon without planning a route,
- and a real block of free time in Hahndorf with included tastings.
Skip it if you:
- hate any time pressure at all (because this day runs on set stop windows and a noon break),
- or you’re only interested in one half (you’ll likely want a more focused Hahndorf-only or Adelaide-only day instead).
If you’re trying to make the most of a limited stay, this one is a solid match. You get the big sights, the best viewpoint stop, and a heritage town where you can choose how you want to spend your time.
FAQ
How long is the Ultimate Adelaide City and Hahndorf Tour?
It runs for about 8 hours.
What time does the tour start?
The tour starts at 9:15 am.
Where does the tour start and end?
It starts at Adelaide Central Bus (Franklin St, Adelaide SA 5000) and ends back at the meeting point.
Is lunch included?
No. Lunch is not included, and you’ll have free time to buy it during the midday break.
What happens around noon on King William Street?
The tour stops around 12:00 pm on King William Street near Rundle Mall. You can get lunch and return to the Adelaide Central Bus Station by 1:00 pm, or stay on the coach (which returns to the center around 12:15 pm). You then board again at 1:15 pm for the afternoon portion.
How long is the stop at Mount Lofty Summit?
The Mount Lofty Summit stop is about 15 minutes.
Is admission included at the National Wine Centre of Australia?
Yes. You’ll have free time to explore the Wine Discovery Journey Museum, and admission is included.
How long do you have in Hahndorf?
You’ll have about 1 hour 50 minutes to explore Hahndorf independently, with included afternoon tea or beer tastings at the Hahndorf Inn Hotel.
How many people are on the tour?
The tour has a maximum of 48 travelers.
What is the cancellation policy?
Free cancellation is available up to 24 hours before the experience’s start time for a full refund.