REVIEW · ADELAIDE
Private Wine Tours McLaren Vale or Adelaide Hills
Book on Viator →Operated by Buckley Estate Farm - Wine Tours · Bookable on Viator
Private wine days feel like local friendship. A McLaren Vale tour with Buckley Estate Farm – Wine Tours turns the usual chaos of tastings into one calm plan, with a private driver/guide who can shape your day around what you actually like. You can also swap in big-name moments like D’Arenberg Cube or lean toward quieter cellar doors with scenery that feels properly South Australia.
What I like most is the flexibility. I love that you can pick your own itinerary or ask Shane (your guide) to build one that fits your palate and time window, so the day feels personal instead of rushed. The second big win for me is the hands-on guidance: Shane shares local context and helps you make smart choices at each stop, from what to order to how long to linger.
One thing to think about before you go: tastings and entrance fees aren’t included (expect about A$10–A$20 per person per venue, plus D’Arenberg’s A$20 entry). That’s normal for wine country, but it does mean your final day-spend depends on how many pours you decide to do.
In This Review
- Key things that make this tour worth your time
- McLaren Vale With Your Own Driver: What You’re Really Buying
- Price and the Real Cost of Tastings (Why A$ adds up fast)
- The 6 to 7 Hour Flow: How Your Day Stays Relaxed
- Stop-by-Stop: From the McLaren Vale Basics to D’Arenberg Cube
- Stop 1: McLaren Vale wine region (a starting point)
- Stop 2: D’Arenberg Cube (Alternate Realities + top-level tasting)
- Stop 3: Oliver’s Taranga (heritage cottage to modern tasting)
- Stop 4: Samuel’s Gorge (the Onkaparinga Gorge view factor)
- Stop 5: Hugo Wines (a vineyard outlook and a likely lunch stop)
- Shane’s Role: Tailored Route, Real Local Tips
- Choosing Tastings Like a Pro (So You Don’t Overspend)
- Food Timing and Lunch Options Without the Guesswork
- Adelaide Pickup, Private Comfort, and the Little Things That Matter
- Should You Book This Private McLaren Vale or Adelaide Hills Wine Tour?
- FAQ
- How long is the Private Wine Tours McLaren Vale or Adelaide Hills experience?
- What is included in the tour price?
- Are wine tastings included in the price?
- How much is D’Arenberg Cube entry?
- What should I budget for tasting fees at other venues?
- Is lunch included?
- Do I get to choose the itinerary?
- Where can the tour pick me up?
- Is this tour private or shared with other groups?
- Can I cancel for a full refund?
Key things that make this tour worth your time
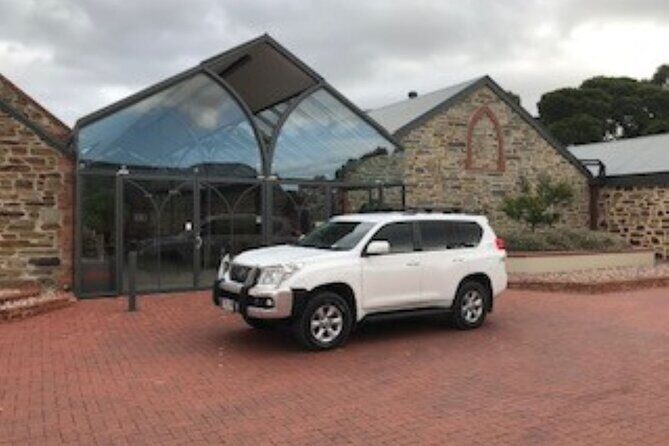
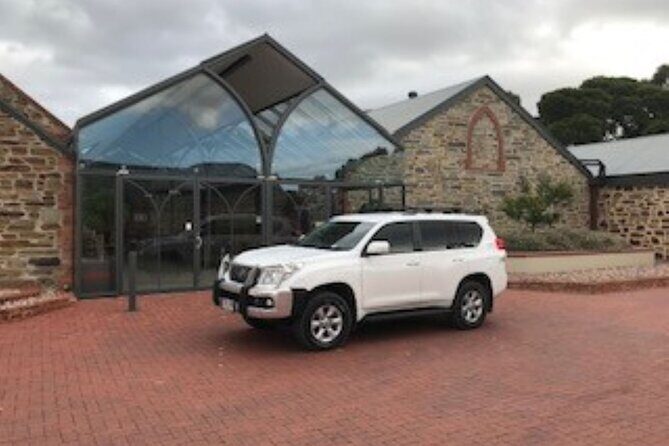
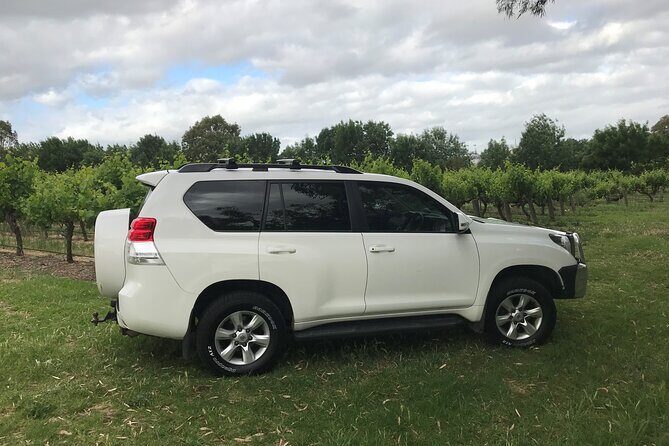
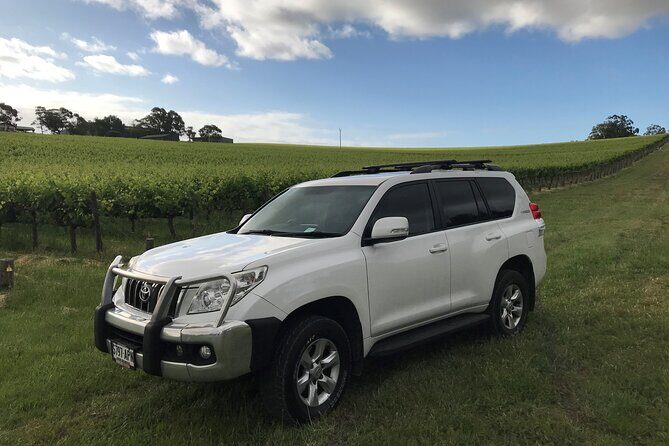
- Private 2-way transfers in an air-conditioned Toyota Prado GXL from Adelaide locations (and options beyond that)
- Shane’s hands-on guiding means you’re not stuck with a generic route
- Flexible itinerary: your day can be classic McLaren Vale, Adelaide Hills, or a mix
- D’Arenberg Cube as an option, with the museum feel and a top-level tasting room
- Snacks and bottled water included, so you don’t start the day scrambling
- Tasting costs are extra, so you control your budget instead of getting hit with surprises
McLaren Vale With Your Own Driver: What You’re Really Buying
This is not a cattle-car wine day. It’s a private outing built around one group, which matters a lot in a region where drive times add up fast. You’re paying for transport plus a local guide, so you can focus on wine (and not on parking, schedules, and getting back safely).
Australia takes drink-driving seriously, and a designated driver makes the whole day more relaxed. Instead of doing math in your head about who’s sober enough to drive, you can actually taste at the pace you want and ask questions at the cellar door.
The other part you’re buying is convenience. Pickup and drop-off are set up for central Adelaide and the south coast, and you can even arrange transfer-style pickup from the Adelaide airport area. That reduces the hassle if you’re staying in town, cruising from elsewhere, or just don’t want to figure out timing on your own.
Other McLaren Vale wine tours reviewed in Adelaide

Price and the Real Cost of Tastings (Why A$ adds up fast)
At A$157.79 per person, the tour itself is a straightforward private-day price for McLaren Vale or the Adelaide Hills area. What makes that number feel fair is what’s included: private transport, bottled water, snacks, and a guide who helps you plan the route.
But you should budget for wine spending separately. The tour doesn’t include alcoholic beverages, and tasting & entrance fees are payable directly at each venue. The data you’re given is clear: tastings/entrance typically run A$10–A$20 per person per venue, and D’Arenberg Cube entry is A$20 per person.
So here’s the practical way to think about value: if you do only a couple tastings, you’ll keep it modest. If you do tasting flights everywhere, you’re making a full wine day of it, and the extra cost is on you. Either way, you stay in control.
The 6 to 7 Hour Flow: How Your Day Stays Relaxed
Most tours in wine country either feel rushed or awkwardly stretched. This one lands in a workable middle, with an approximate 6 to 7 hour duration. In that time, you can comfortably cover multiple cellar doors plus one bigger stop like D’Arenberg Cube, without feeling like you’re sprinting between appointments.
The itinerary is flexible. The listed stops are examples, not a fixed script, and your guide can adjust based on what you want to prioritize. In practice, that means you can keep the day moving if you like variety, or slow down if you’re chasing scenery, fewer wines, or a longer lunch.
I also appreciate that some stops have admission listed as free, while tastings still aren’t bundled. That’s common in Australia’s cellar door culture: you can walk in, look around, and then decide what level of tasting you want to pay for.
Stop-by-Stop: From the McLaren Vale Basics to D’Arenberg Cube
Here’s what the day looks like when it follows the provided route options.
Stop 1: McLaren Vale wine region (a starting point)
You begin in the McLaren Vale region, and the initial venue is listed with free admission. This is a good way to get oriented fast. Even if you already know McLaren Vale is famous for shiraz and other bold reds, having a guide means you’ll learn what to look for as you move through the day.
Practical tip: this is a nice moment to ask Shane what style of tasting you should aim for based on what you normally drink. If you love full-bodied reds, you’ll get a different plan than if you want something lighter and more food-friendly.
Other Adelaide Hills and Hahndorf tours reviewed in Adelaide

Stop 2: D’Arenberg Cube (Alternate Realities + top-level tasting)
If you pick one “big wow” stop, make it D’Arenberg Cube. The attraction is more than a tasting room. You explore the Alternate Realities Museum, then finish in the tasting space on the top level, with spectacular views.
This is a great choice if you want your wine day to include something cultural and visual, not just sampling. It can also be a strong anchor stop in your schedule because it’s easy to plan around: see the art, taste the wine, enjoy the view, then move on.
Cost note: D’Arenberg entry is A$20 per person, and the itinerary lists admission as not included. Also, tastings aren’t bundled into the tour price, so you’ll pay at the venue based on what you choose.
Stop 3: Oliver’s Taranga (heritage cottage to modern tasting)
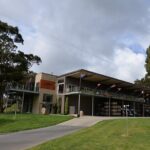
Next is Oliver’s Taranga Vineyards Cellar Door and Winery, with a mix that feels like old and new. You visit the heritage-listed 1850s stone cottage, and then step into a world-class tasting venue that’s been added more recently.
What I like about this type of stop is contrast. You get the historic feel of family vignerons—this is still described as being in family hands with 6th-generation vignerons—and you taste in a modern setting. If you like stories that are tied to place, this stop tends to deliver.
Tasting is not included, so it’s a great place to decide what you want to spend your tasting budget on. If you’re stretching your day costs, you can concentrate your pours here and keep later stops lighter.
Stop 4: Samuel’s Gorge (the Onkaparinga Gorge view factor)
Then comes Samuel’s Gorge, described as a rustic 1853 farm shed set above the Onkaparinga Gorge National Park. The view element is a big part of why this stop works. It feels like a breather from the more polished cellar door scenes.
Wine-wise, you’re told their wines are exceptional, and mostly red. That’s useful information for your tasting decisions. If you normally lean toward reds, you’ll likely feel comfortable here. If you prefer whites or lighter styles, ask Shane what’s tasting well on the day.
This stop lists admission free, but tastings still cost at the venue.
Stop 5: Hugo Wines (a vineyard outlook and a likely lunch stop)
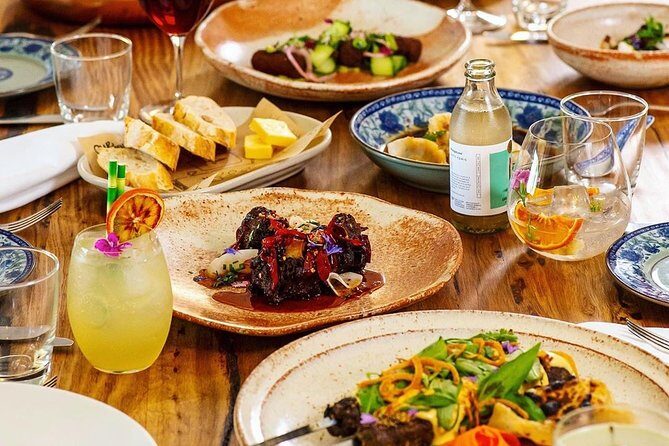
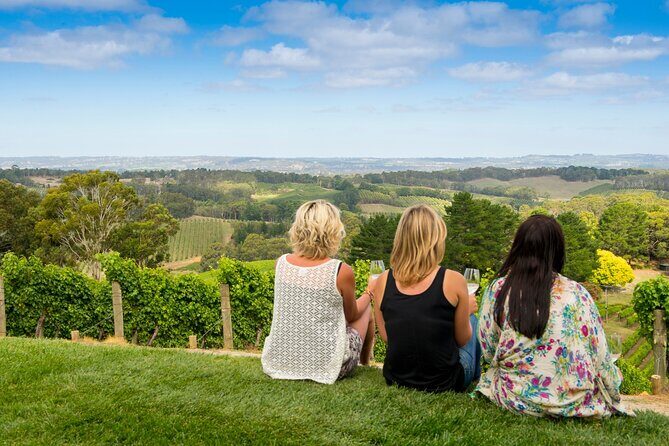
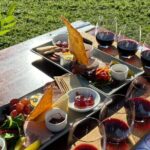
A typical finish includes Hugo Wines, a picturesque cellar door overlooking the vineyard, with a farming story that’s described as spanning five generations. This is also positioned as an ideal lunch stop, with generous platters available.
Even if lunch itself isn’t included in the tour price, this is the part of the day where it often becomes satisfying. You get food, a view, and a relaxed final chapter before heading back toward Adelaide.
If you want something else for lunch, your guide can also adjust. One example from the tour experience is a relaxed lunch in Hahndorf (Adelaide Hills), which shows the day can shift toward the Hills if that suits your taste.
Shane’s Role: Tailored Route, Real Local Tips
Shane is the name that keeps showing up for a reason: he runs these days like a personal tour, not a scripted shuffle. The practical benefit is that you get flexibility without losing the structure that keeps a wine day from turning into chaos.
From the feedback, Shane is described as:
- meeting people with a warm, welcoming start
- being highly familiar with the area because he lives nearby
- building bookings based on your preferences
- adjusting on the fly when a stop runs long or when you want to swap in something like D’Arenberg Cube
One detail I really like from the experience accounts: the guide doesn’t just drive and talk. He provides context on the drive and during stops so you understand what you’re tasting and where it comes from. That makes the day feel more “you learned something” and less “you checked boxes.”
Also, if you’re the type who loves animals and little side stories, one account mentions a visit to his alpaca farm when asked. That’s not guaranteed as part of every schedule, but it’s an example of the personal touch you might get if time allows.
Choosing Tastings Like a Pro (So You Don’t Overspend)
Because tastings are pay-as-you-go, you’ll get the best day by setting a tasting strategy before you order. Here’s how I’d do it if you want to keep it fun and within budget.
First, pick a theme. If you love shiraz or bold reds, you’ll likely enjoy the red-leaning stops like Samuel’s Gorge. If you’re open-minded, let Shane guide you toward pairings that make sense with what’s poured that day.
Second, decide how many pours per venue you want. The pricing info given (A$10–A$20 per person per venue) means you can quickly estimate the day total. If you’re doing four tasting venues, it adds up fast, so it’s worth choosing where you want the biggest tasting flight.
Third, use the environment to guide your pacing. Places like D’Arenberg Cube are designed for you to slow down for the museum and views. Rustic stops like Samuel’s Gorge often reward a calm pace too. If you’re trying to “hit everything,” you’ll feel rushed and less likely to enjoy the wine fully.
Food Timing and Lunch Options Without the Guesswork
Lunch isn’t included, but you do have a built-in rhythm. Hugo Wines is set up as a place where lunch can happen, with platters offered. That means you can align your food break with your final winery stop rather than hunting for a restaurant after you’re already tired.
If you prefer the Adelaide Hills vibe, your guide can tailor the day. One example route includes a leisurely lunch in Hahndorf, which is a classic way to soften a wine day with a town stop and an easier meal pace.
Practical tip: you’ll feel better if you eat before your biggest tasting rounds. Snacks and bottled water are included, but they’re not a substitute for a real meal when you’re tasting alcohol.
Adelaide Pickup, Private Comfort, and the Little Things That Matter
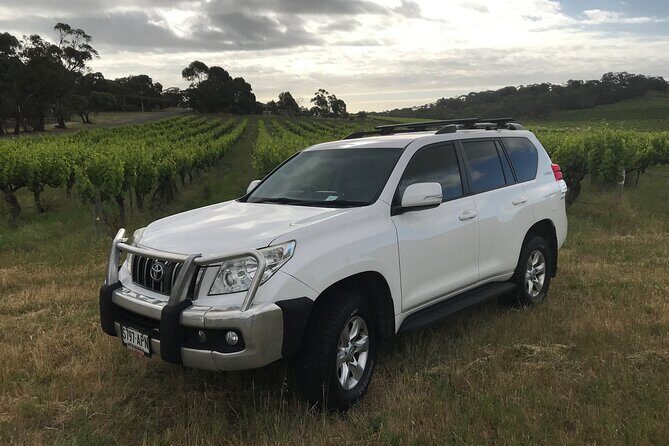
The tour is private, and you’re riding in a Toyota Prado GXL with air conditioning. For many people, that’s part of the value. Long drives in warm weather can drain a day. Having comfortable transport keeps the day from feeling like work.
The tour also includes bottled water and snacks, which helps you stay steady between tastings. That small included item can prevent the classic wine-day problem: you forget to eat, get tired, and then your last tasting tastes worse than it should.
There’s also a mobile ticket, which is handy when you’re moving between pickup points. Confirmation comes at booking, and service animals are allowed.
One logistics detail to watch: if you’re coming from a Port Adelaide Cruise terminal, there’s a A$40 surcharge. It’s not surprising, but you’ll want to factor it into what you think you’re paying.
Should You Book This Private McLaren Vale or Adelaide Hills Wine Tour?
I’d book this tour if you want a private day with a guide who can shape the route around your preferences, not someone else’s agenda. It’s especially smart if you’re traveling in a small group and you’d rather spend your time on tastings and views instead of figuring out drivers, parking, and timing.
Skip it only if you’re trying to do a very low-cost day. Because tastings and entrance fees are extra, your total spend depends on how many venues you taste at and which paid attractions you choose. If you’re comfortable budgeting for that, you’ll likely find this is a smooth, friendly way to experience McLaren Vale (and potentially Adelaide Hills) with real flexibility.
FAQ
How long is the Private Wine Tours McLaren Vale or Adelaide Hills experience?
It runs for approximately 6 to 7 hours.
What is included in the tour price?
You get bottled water, snacks, an air-conditioned vehicle, private transportation, a local wine knowledgeable guide, and private pick up/drop off in a Toyota Prado GXL.
Are wine tastings included in the price?
No. Tasting fees and food are payable directly to the venue.
How much is D’Arenberg Cube entry?
D’Arenberg entry is listed at A$20.00 per person.
What should I budget for tasting fees at other venues?
Tasting & entrance fees are listed at about A$10.00–A$20.00 per person per venue.
Is lunch included?
Lunch is not included, though the itinerary includes an option where lunch platters are available.
Do I get to choose the itinerary?
Yes. You can pick your own itinerary or ask the host to create one for you.
Where can the tour pick me up?
Pickup is offered from Adelaide airport, the CBD, and the south coast area. If you’re picking up from the Port Adelaide Cruise terminal, a A$40.00 surcharge applies.
Is this tour private or shared with other groups?
This is a private tour/activity. Only your group participates.
Can I cancel for a full refund?
Yes. Free cancellation is available if you cancel at least 24 hours in advance for a full refund.